
Getting started

How to invite your team

Add colleagues to your organization with the right role so they can help with invoices, expenses, or read-only review.

1 min readUpdated 10.07.2026

Team invitations let coworkers access the same organization with controlled permissions. Only owners and admins can send invitations — see understanding navigation and permissions for role differences.
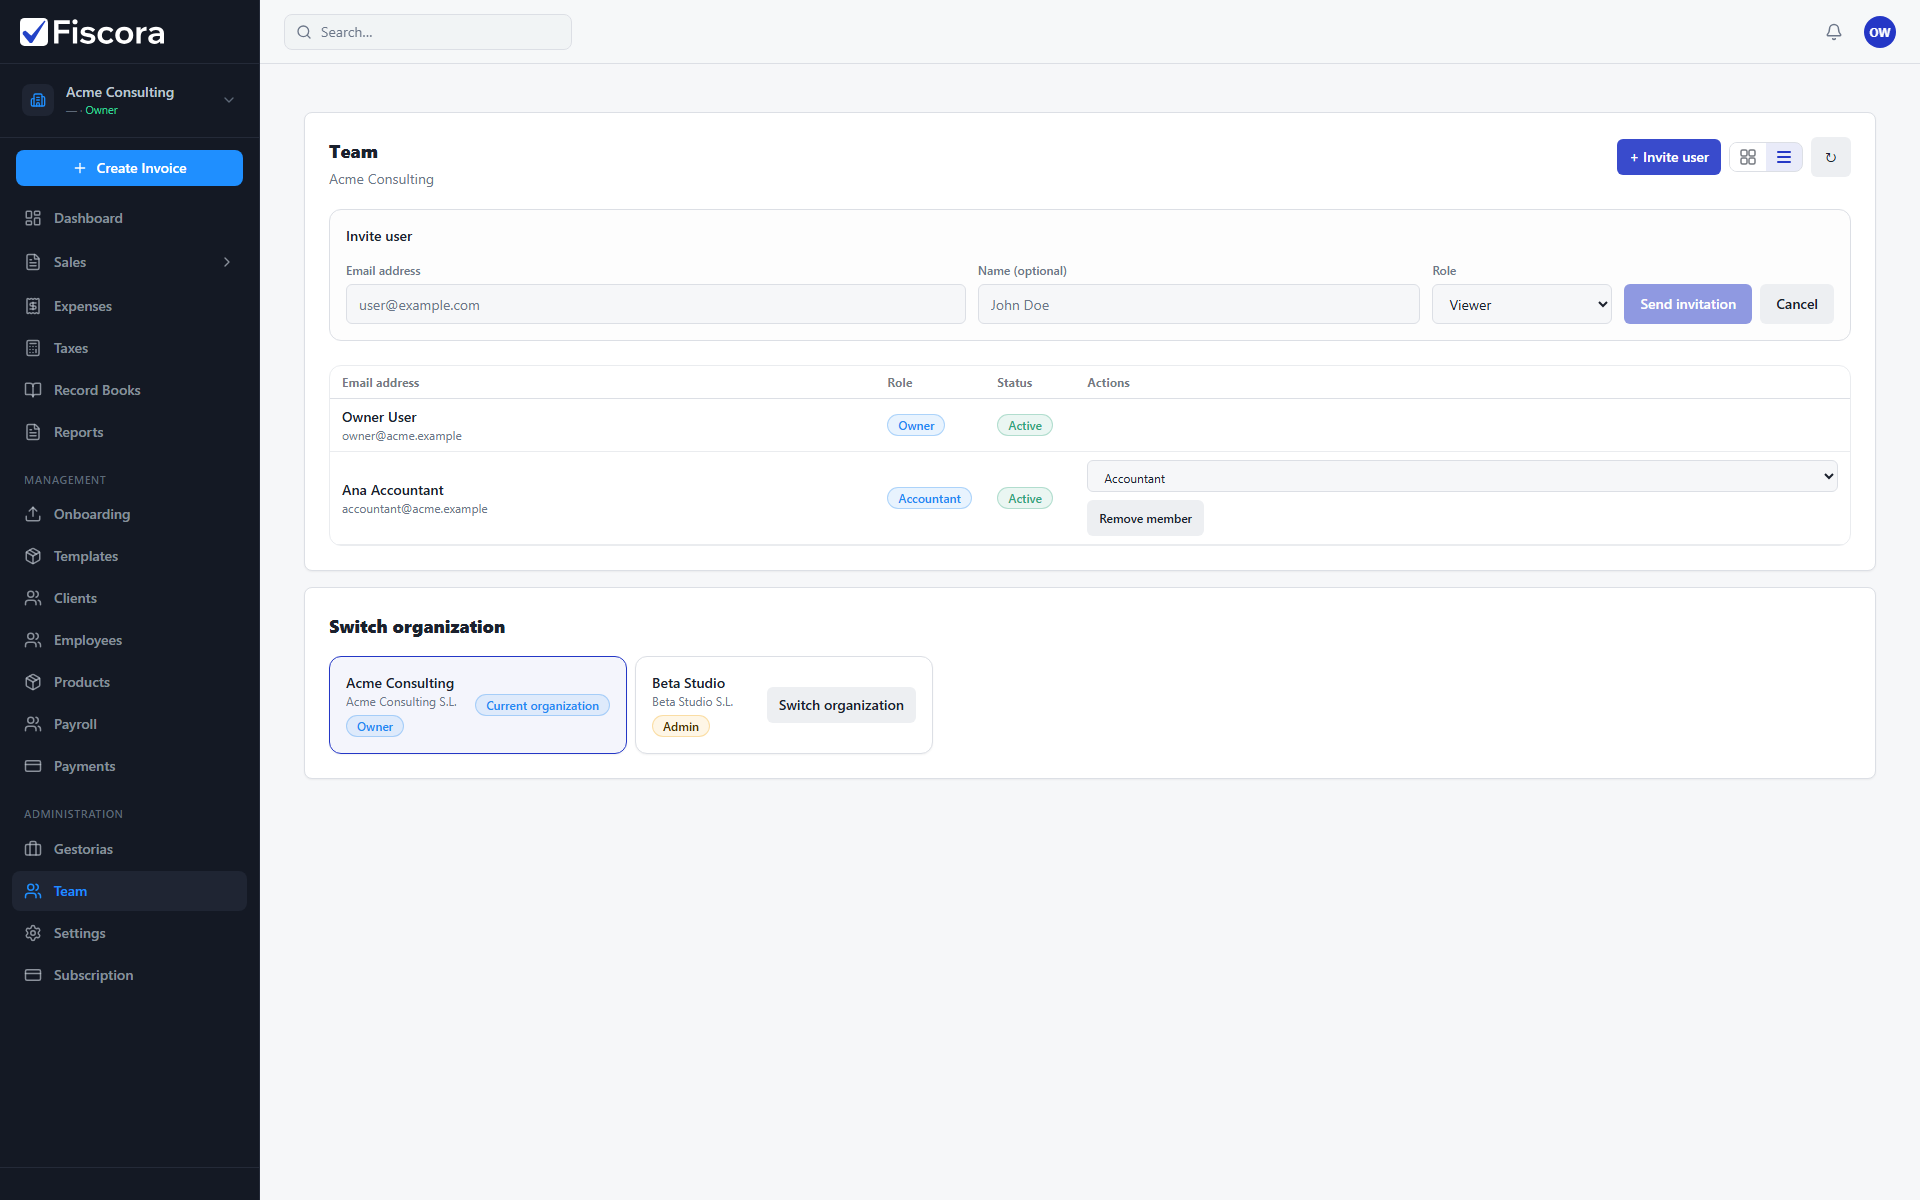
Team page with the invite form open for email, name, and role.

Open the Team page

  1. Select Team under Administration in the left navigation.
  2. You can also open it from your profile menu if you are an admin or owner.

Send an invitation

  1. Select Invite user.
  2. Enter the colleague email address and optional display name.
  3. Choose a role: Admin, Accountant, or Viewer.
  4. Select Send invitation.

After inviting

  1. Invited users appear with an Invited status until they accept.
  2. Use Resend invitation if the email needs to be sent again.
  3. Change roles later from the member actions if responsibilities shift — see how to review organization access and security.

Was this article helpful?

Still need help?

Share the context and we'll reply with practical guidance from support.

Open request

You may also find these useful

Getting started

Getting started with your workspace

Learn the first screens to check when you log in and where to find invoicing, clients, expenses, and settings.

Read article
Getting started

How to use the dashboard

Understand the summary cards, required actions, and recent activity so you can spot what needs attention quickly.

Read article
Getting started

How to set up your workspace on day one

Complete the essential setup steps so your company profile, clients, and invoice defaults are ready before you bill.

Read article