
A short setup pass on day one saves time later. Focus on the details that appear on invoices, client records, and dashboard totals before you issue your first real document.
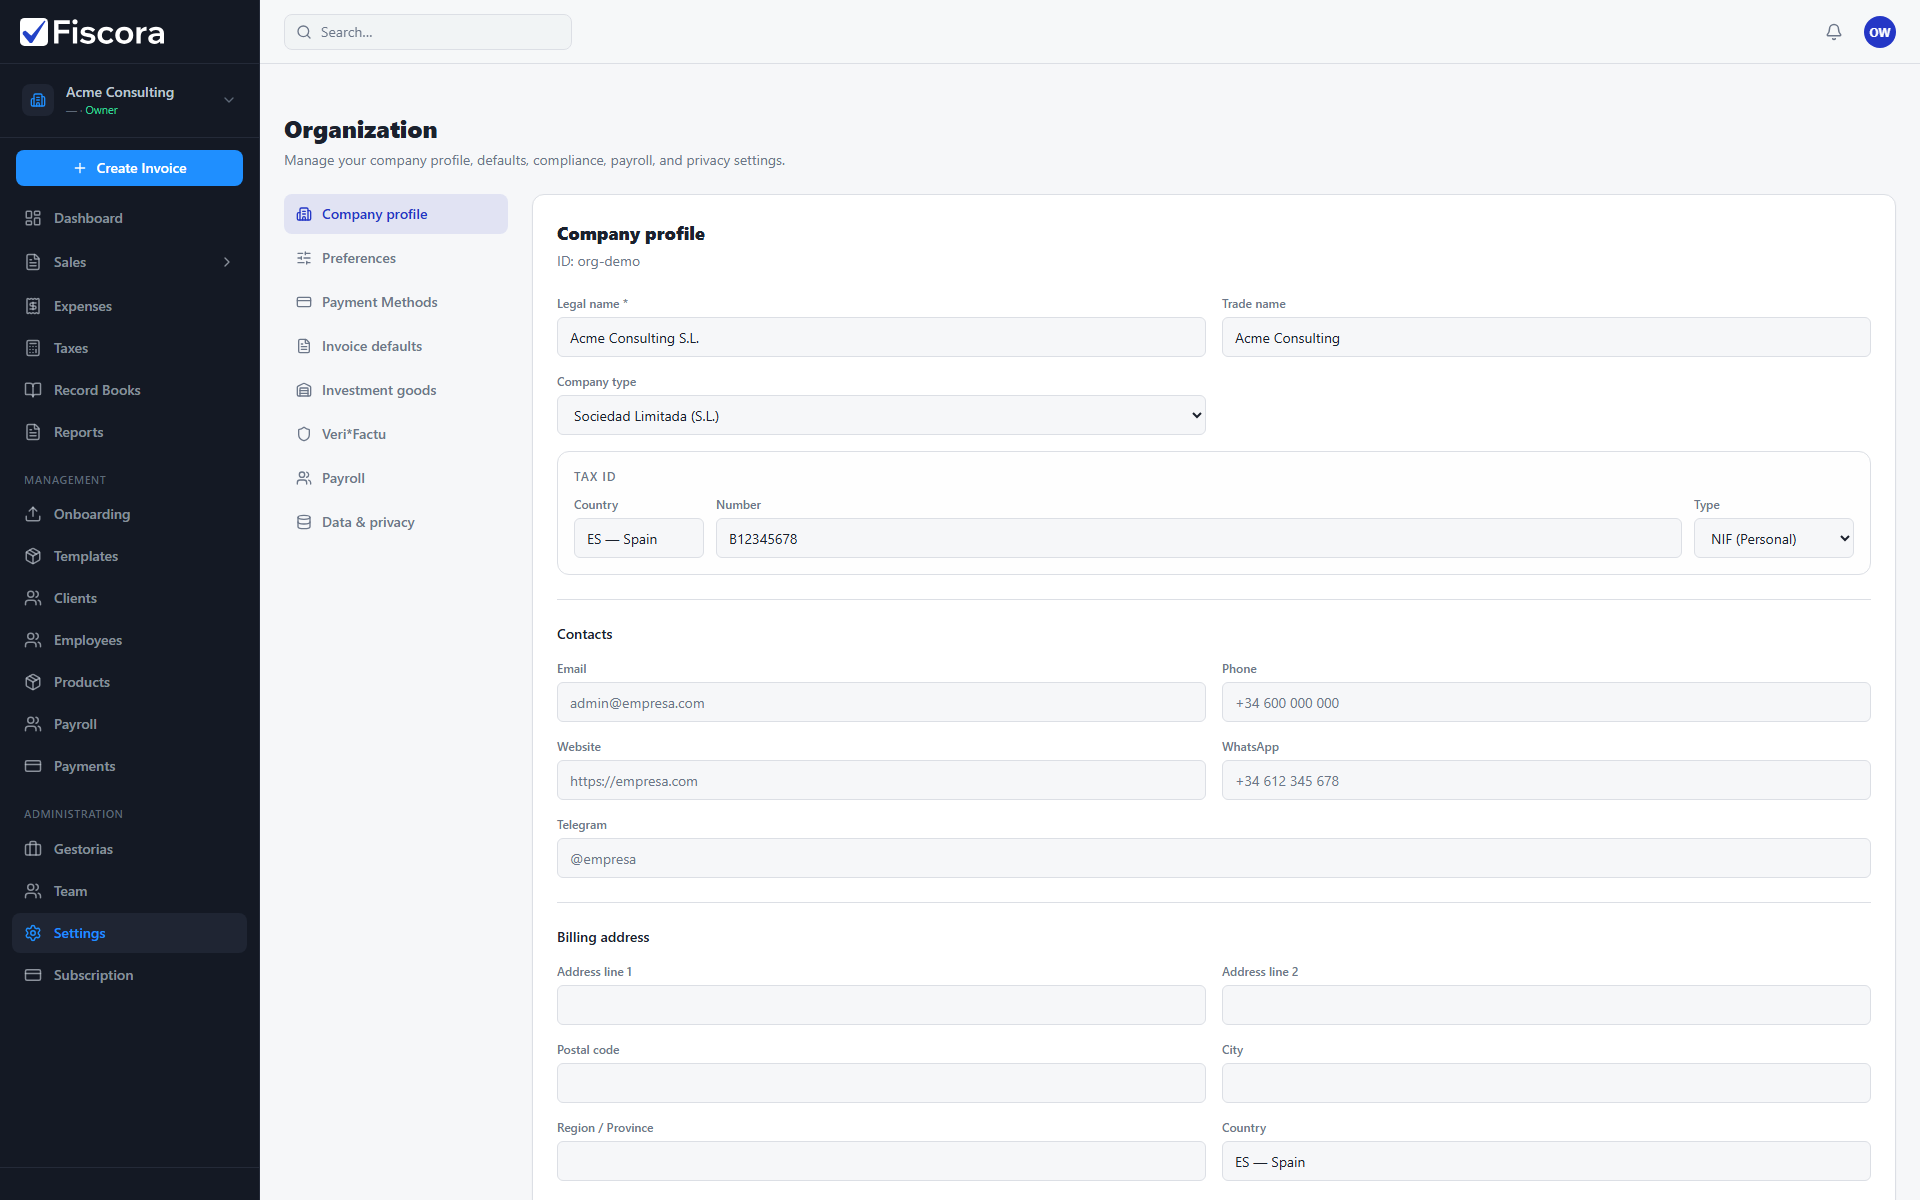
Step 1 — Confirm company details
- Select Settings in the left navigation.
- Open the Company section.
- Enter your legal name, tax ID, company type, and billing address.
- Add contact details such as email and phone that should appear on customer-facing documents — see how to manage branding and contact details for the full contact block.
- For field-by-field guidance, see how to update company legal details.
- Select Save.
Step 2 — Set invoice defaults
- In organization settings, open Invoice defaults.
- Set your default series, payment terms, and PDF template style.
- Save the section so new invoices start with the right numbering and layout — see how to change invoice defaults for details.
Step 3 — Add your main clients
- Open Clients and create records for the customers you bill most often.
- Include email and tax ID where available so sending invoices is smoother later — see how to handle client tax details for tax fields.
Step 4 — Review the dashboard
- Return to Dashboard to confirm the workspace is ready.
- Check whether any required actions appear, such as missing setup items or documents waiting for review.
- When company details and at least one client are in place, you can create your first invoice.