
Expenses

How to export or share expense records

Download expense data as CSV or ZIP for a chosen period, or grant your gestoria read access instead of emailing files manually.

1 min readUpdated 10.07.2026

You can export confirmed expense records for bookkeeping outside Fiscora, or share live access with a connected gestoría — see how to share documents with your firm. Confirm expenses first with how to confirm an expense.
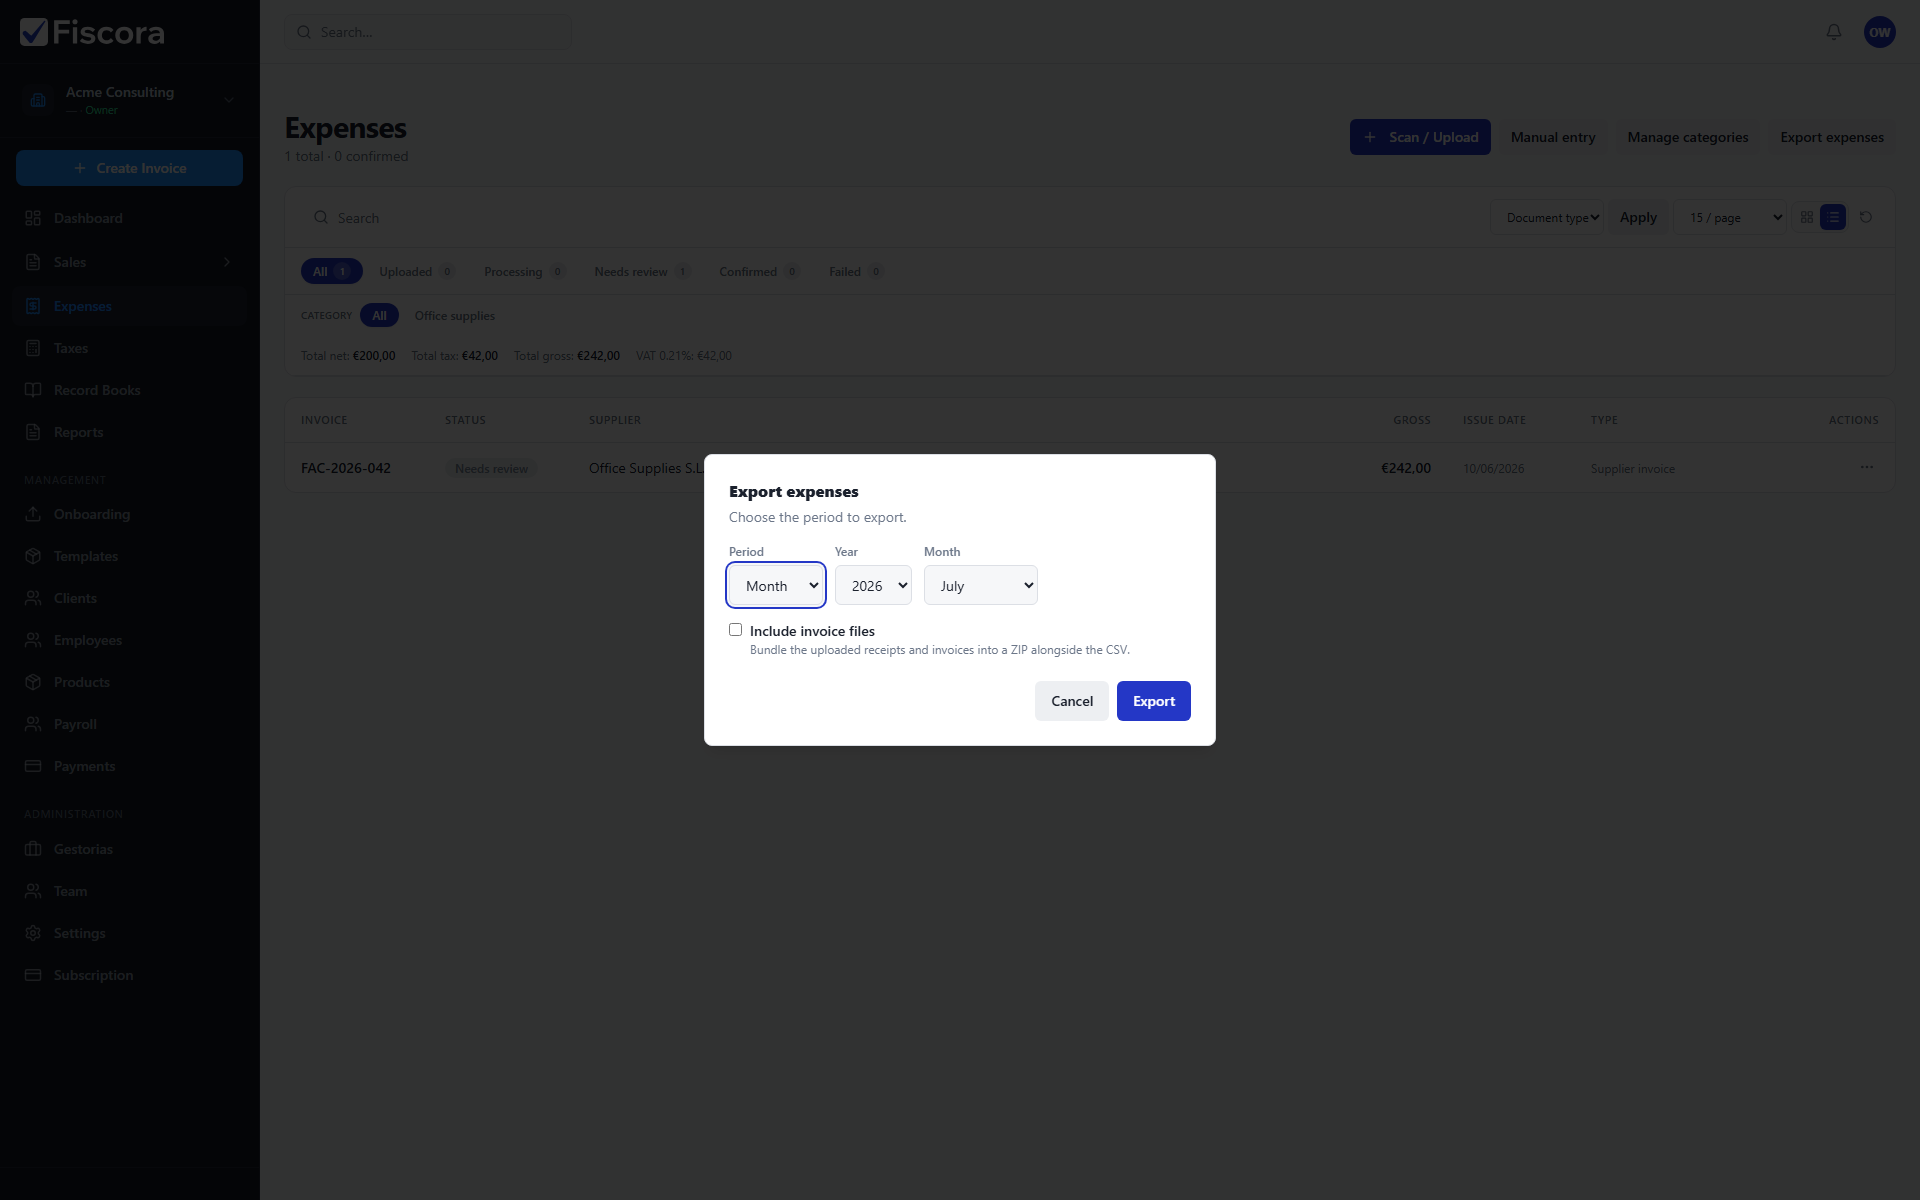
Export expenses dialog with period selectors and include-files option.

Export expenses from the list

  1. Open Expenses in the left navigation.
  2. Select Export expenses in the page header.
  3. Choose a period: month, quarter, or year.
  4. Pick the year and, when needed, the month or quarter to export.

Choose export contents

  1. Leave Include invoice files unchecked when you only need the CSV summary.
  2. Enable the checkbox to bundle uploaded receipts and supplier PDFs into a ZIP alongside the CSV.
  3. Select Export and wait for the download to start.

Share records with your firm instead

  1. Open Gestorias and connect your accounting firm if you have not already.
  2. Use Manage access to grant expense read or export permissions.
  3. Keep expenses confirmed and categorized so your firm can work from current data without repeated exports.

Was this article helpful?

Still need help?

Share the context and we'll reply with practical guidance from support.

Open request

You may also find these useful

Expenses

How to record and review expenses

Track uploaded receipts and supplier invoices, then review which expenses still need attention before confirmation.

Read article
Expenses

How to upload a receipt or bill

Add supplier documents through Scan / Upload so Fiscora can read them with AI, or enter an expense manually.

Read article
Expenses

How to enter an expense manually

Create a supplier expense without uploading a document by filling the manual entry form.

Read article